Transforming a simple salad or soup into an extraordinary culinary experience often comes down to one unassuming ingredient: the crouton. Forget everything you thought you knew about those hard, dry, store-bought nuggets. Homemade croutons are an entirely different species – a revelation of texture and flavor that will forever change your appreciation for this humble topping.
Imagine biting into a crouton that doesn't just crunch, but shatters with a delightful crispness, revealing a tender, buttery interior. As one delighted diner famously described it, it's "like a soft biscuit of crunchiness instead of a hard rock." This isn't just a dream; it's the delicious reality of homemade croutons, and they are surprisingly simple to master. From choosing your ideal bread to experimenting with a kaleidoscope of flavors, we'll unlock the secrets to crafting the perfect crouton, every time.
Why Homemade Croutons Reign Supreme
The gap in quality between homemade and store-bought croutons is not just wide; it's a chasm. While commercial versions often feel like an afterthought – brittle, overly dry, and lacking in character – homemade croutons are a star in their own right. They boast a freshness that simply can't be replicated, a vibrant taste that elevates any dish they accompany.
When you make them yourself, you control every element. You dictate the level of crispness, the richness of the fat, and the symphony of seasonings. This level of customization ensures that your croutons are always perfectly tailored to your palate and the meal they're accentuating. They don't just add crunch; they add a layer of sophisticated flavor and a satisfying mouthfeel that makes every bite an absolute pleasure. Once you experience the difference, you'll understand why making your own is not just a preference, but a delightful necessity. For a deeper dive into why homemade will always win, check out our article on Easy Homemade Croutons: Why They Beat Store-Bought.
The Foundation: Choosing Your Bread and Cut
The journey to the perfect homemade crouton begins with the bread. While nearly any bread can be transformed into a crouton, the type you choose will significantly impact the final texture and flavor. Stale bread is often preferred, as its reduced moisture content means it will toast and crisp up faster and more uniformly, preventing a chewy interior.
Selecting Your Bread
- Crusty Loaves: Sourdough boules, French baguettes, or Italian loaves are excellent choices. Their open crumb structure provides ideal pockets for seasonings to nestle into, and their rustic crusts add an extra layer of crunch and flavor.
- Soft White Bread: While less traditional, soft white breads can yield a lighter, more delicate crouton, almost melt-in-your-mouth. Think brioche or challah for a richer, slightly sweeter crouton that works wonderfully with fruit salads or decadent soups.
- Whole Wheat/Grain: For a healthier, nuttier profile, whole wheat or multi-grain breads can be fantastic. Just be mindful that they may require a slightly longer baking time due to their density.
- Any Bread Works: Ultimately, croutons are a fantastic way to use up day-old bread, preventing waste. Don't be afraid to experiment with whatever you have on hand!
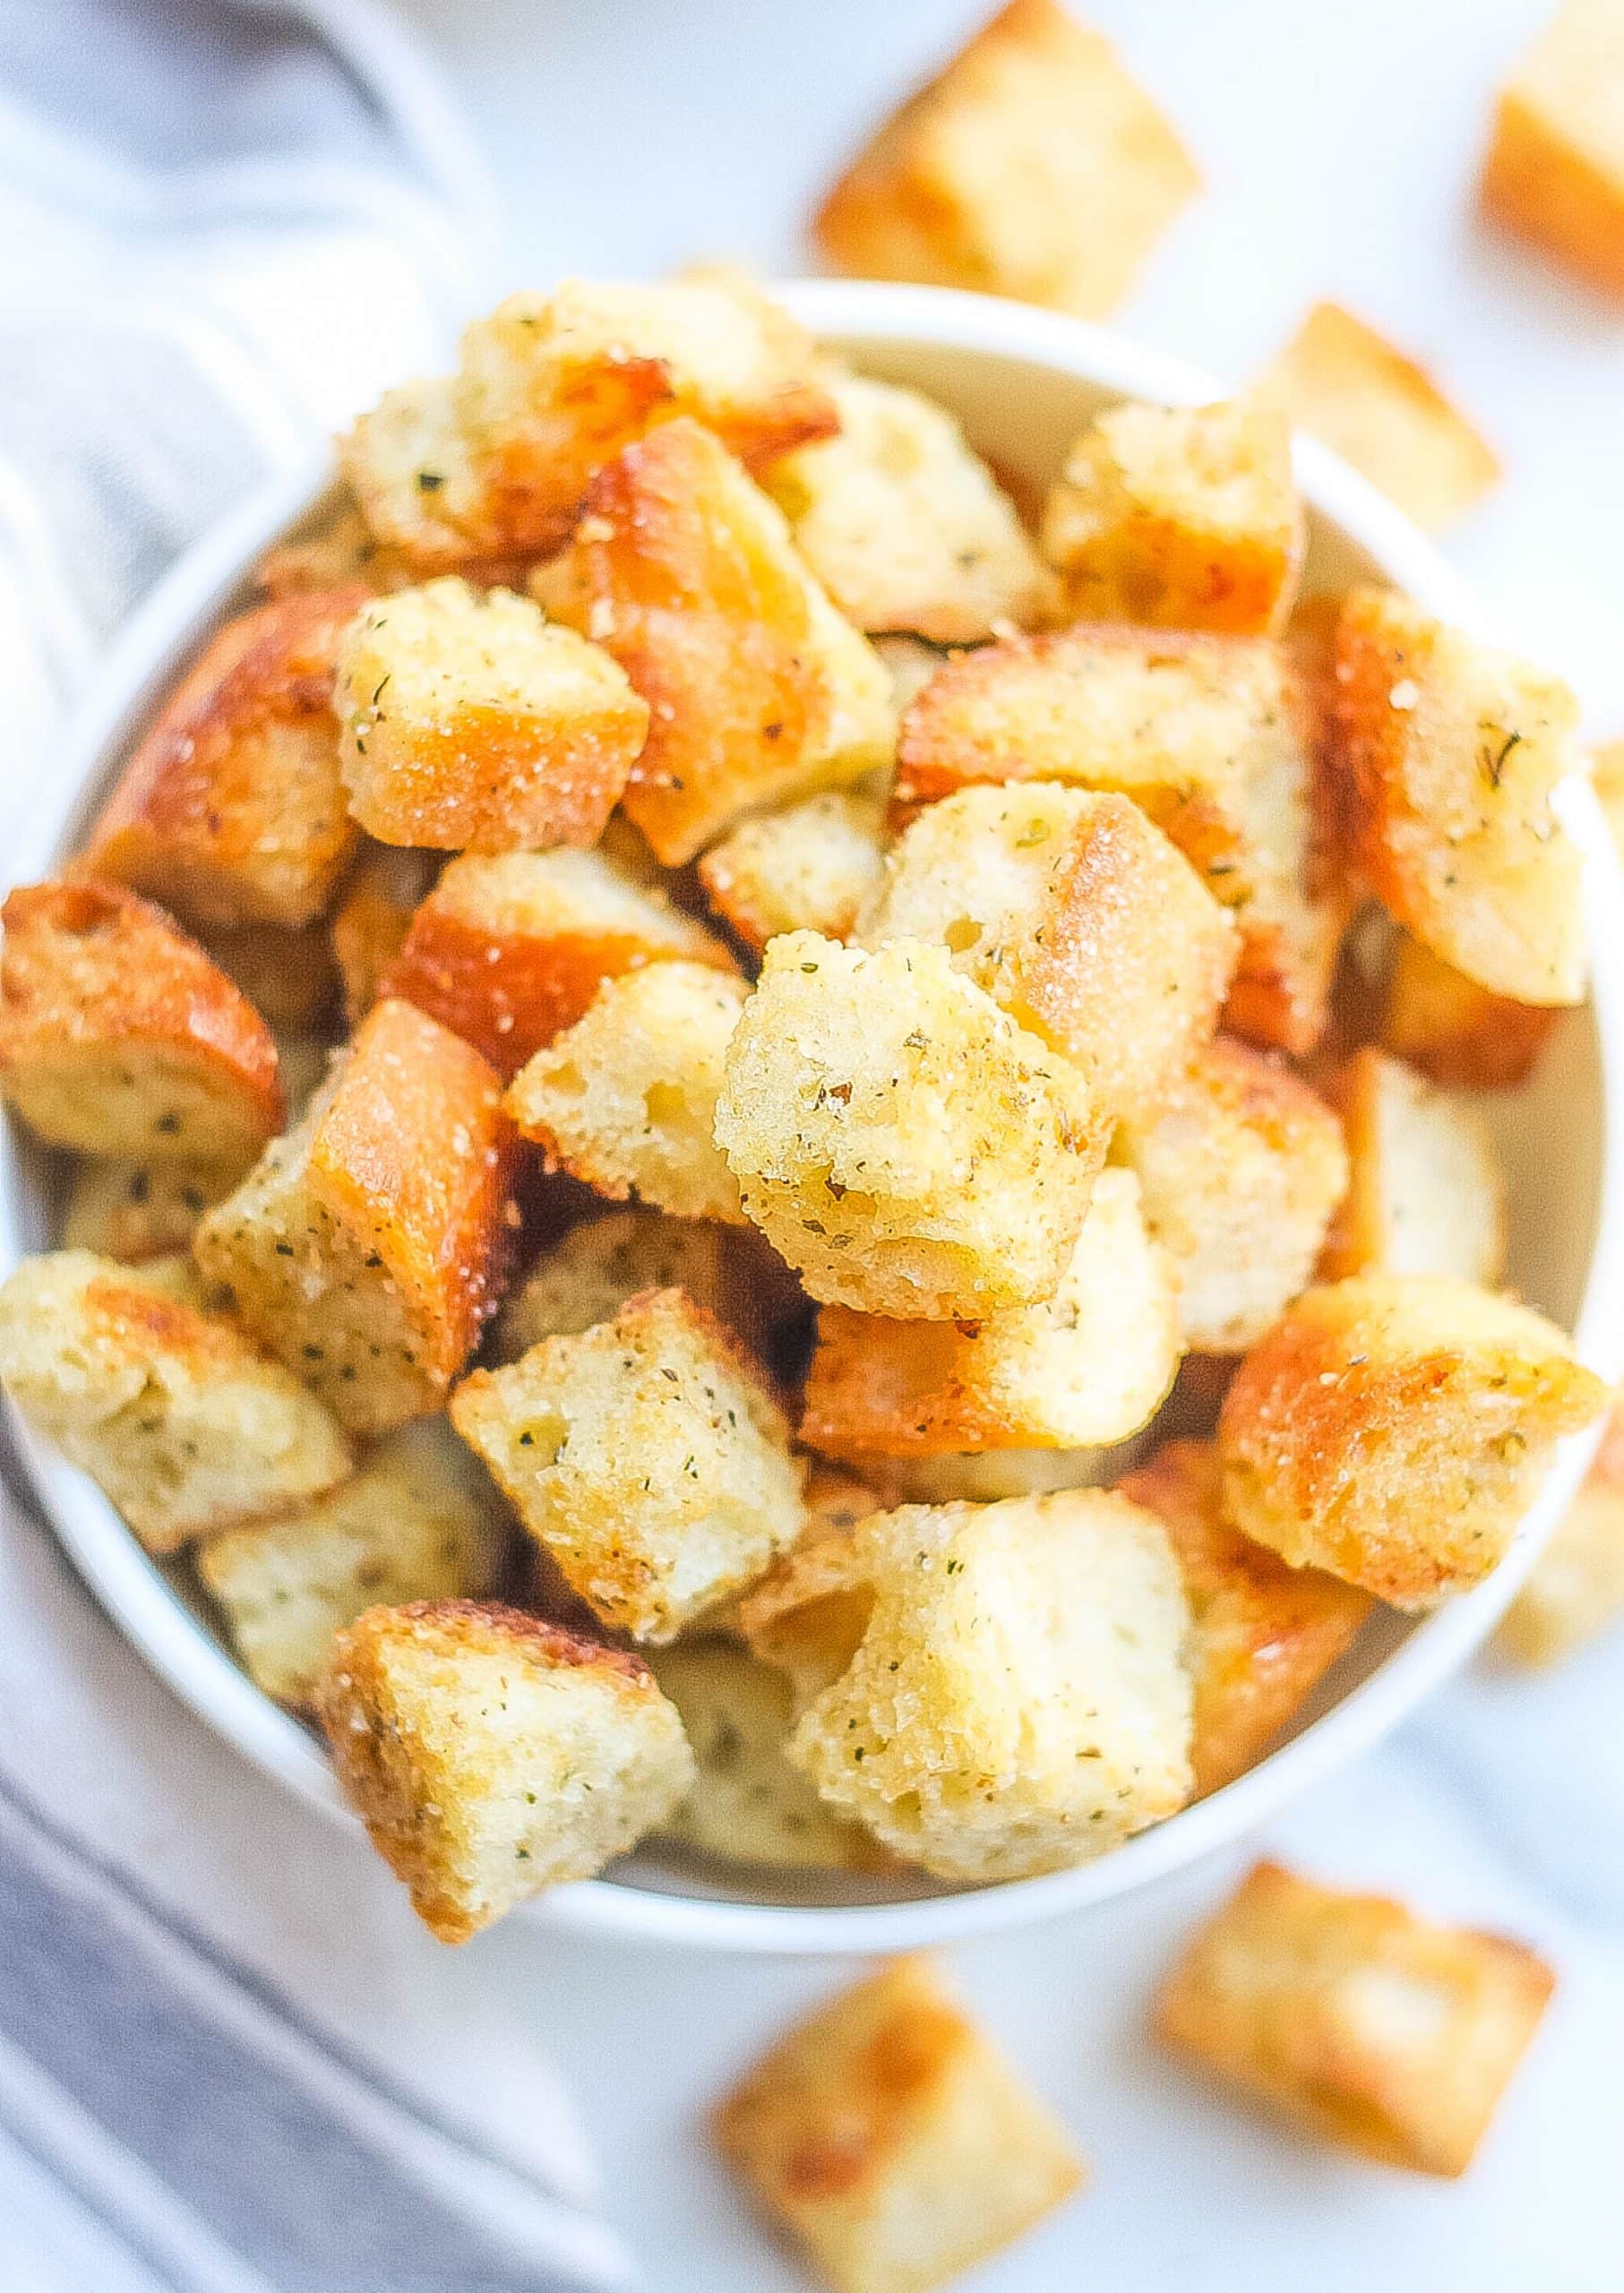
Texture Options: Cubes vs. Craggy Pieces
Beyond the type of bread, how you prepare it also dictates the crouton's character. You have two primary texture options:
- Neat Cubes: Cutting your bread into uniform cubes (typically ½ to 1-inch) results in a more robust, even crunch. These are classic, present beautifully, and offer a consistent bite. They hold up well in heartier soups and salads.
- Craggy Torn Pieces: For a more rustic, delicate crunch, tear your bread into irregular, craggy pieces. The uneven surfaces create more nooks and crannies for flavor to cling to and can result in a lighter, airier texture that shatters more readily. Many find these "torn" croutons more satisfying for direct snacking or lighter salads due to their inherent deliciousness.
The size of your chosen pieces will also influence the baking time – smaller pieces will crisp up faster, while larger ones will take longer and yield a chewier center.
Mastering the Art of Flavor & Fat
Once you've chosen and prepared your bread, it's time to infuse it with the rich flavors and fats that will define your homemade croutons.
The Essential Fat
Fat is crucial for achieving that golden-brown color and irresistible crispness. The best approach often involves a blend:
- Olive Oil: Provides a classic, slightly peppery flavor and helps achieve a fantastic exterior crunch. Extra virgin olive oil is preferred for its robust taste.
- Melted Butter: Adds a rich, creamy depth and contributes to a beautiful golden hue.
- The Blend: A combination of olive oil and melted butter often yields the best of both worlds – the crispness of oil with the luxurious flavor of butter. A good rule of thumb is one tablespoon of fat per slightly heaping cup of cubed bread.
- Variations: Feel free to use only oil or only butter. For a neutral flavor, consider avocado oil. If you're going for a specific culinary theme, try a flavored oil like garlic-infused olive oil.
Seasoning and Flavor Boosts
This is where the real magic happens, allowing you to customize your croutons to perfectly complement any dish. The only truly non-negotiable seasoning is kosher salt, which enhances all other flavors.
Here are some popular and inventive flavor combinations:
- Classic Italian: Freshly cracked black pepper, granulated garlic or garlic powder, and a generous sprinkle of freshly grated Parmesan cheese. For an extra kick, add a pinch of dried oregano or Italian seasoning.
- Herbal Delight: Mix in finely chopped fresh or dried herbs like rosemary, thyme, or sage along with your fat and salt.
- Spicy Kick: A dash of smoked paprika, cayenne pepper, or chili powder can add a pleasant warmth.
- Umami Bomb: Nutritional yeast offers a cheesy, savory depth, even without actual cheese. A tiny bit of mushroom powder can also enhance this.
- Gourmet Blends:
- Ranch Style: A sprinkle of ranch seasoning powder for a fun, zesty, "junk-food" vibe.
- Curry Infusion: Curry powder for an aromatic, savory, and exotic twist.
- Lemon & Herb: Add the zest of one lemon along with your favorite herbs for a bright, fresh flavor.
- Cheese Choices: If using cheese, opt for hard, aged varieties like Parmesan, Pecorino Romano, or even a sharp cheddar, grated very finely so it adheres and crisps up rather than melting into a messy puddle.
Pro Tip: Ensure your bread pieces are thoroughly coated in the oil/butter mixture before adding the dry seasonings. The fat acts as an adhesive, helping the spices cling rather than falling to the bottom of the bowl or baking sheet.
Cooking Methods: Oven vs. Stovetop
You have two excellent methods for transforming your seasoned bread into golden, crispy croutons, each with its own advantages.
The Oven Method (Baked Croutons)
This is arguably the most common and often preferred method for its hands-off nature and ability to produce consistently crispy croutons.
- Preheat: Begin by preheating your oven to 375ºF (190ºC).
- Season & Toss: In a large bowl, combine your bread cubes or torn pieces with your chosen fat (olive oil, melted butter, or both), salt, pepper, garlic powder, and any other seasonings (like Parmesan cheese). Toss everything together until the bread is very well coated. Don't be shy – every piece should glisten. (This is also the perfect moment to "test" a seasoned piece of bread – it's already delicious!)
- Spread & Bake: Spread the seasoned bread in a single layer on a large baking sheet. Crucially, give the croutons plenty of room to breathe; if they're too crowded, they will steam instead of brown and crisp. Use two baking sheets if necessary.
- Cook & Flip: Bake for about 10-15 minutes. Halfway through, use a spatula to flip and stir the croutons to ensure even browning on all sides. Continue baking until they are golden brown and uniformly crisp. Keep a close eye on them, as they can go from perfectly golden to burnt quickly.
- Cool: Remove from the oven and let them cool completely on the baking sheet. They will crisp up further as they cool.
Expert Tip: For an even drier, more brittle crunch, you can bake them at a slightly lower temperature (e.g., 325°F/160°C) for a longer period (20-30 minutes), or let them cool completely in the turned-off oven.
The Stovetop Method (Skillet Croutons)
Ideal for smaller batches or when you're short on time, the stovetop method offers speed and direct control.
- Heat Fat: Heat your chosen fat (olive oil, butter, or a blend) in a large skillet or frying pan over medium heat.
- Add Bread: Add your seasoned bread pieces to the hot skillet. Avoid overcrowding; cook in batches if necessary.
- Toss & Cook: Cook, tossing frequently with tongs or a spatula, until the croutons are golden brown and crispy on all sides. This usually takes about 5-8 minutes.
- Cool: Transfer to a plate lined with a paper towel to absorb any excess fat, then let them cool completely.
Expert Tip: The stovetop method tends to brown more intensely, so keep the heat moderate and your eye on the pan to prevent burning. For a full comparison and more detailed instructions on both methods, check out our article Make Perfect Croutons: Oven, Stovetop & Flavor Customization.
Storing Your Homemade Delights
To keep your homemade croutons at their best, ensure they are completely cool before storing. Warm croutons will create condensation, leading to sogginess.
- Airtight Container: Store cooled croutons in an airtight container or a zip-top bag at room temperature.
- Shelf Life: Properly stored, they will retain their crispness and flavor for 3-5 days.
- Avoid Refrigeration: Do not refrigerate croutons, as the moisture in the fridge can soften them.
- Freezing: For longer storage (up to 2-3 months), croutons can be frozen. Spread them in a single layer on a baking sheet to freeze solid, then transfer to a freezer-safe bag. Re-crisp in a preheated oven (350°F/175°C) for a few minutes before serving.
Homemade croutons are more than just a garnish; they are a testament to the power of simple ingredients and a little effort. With the knowledge of different bread types, cutting techniques, flavor profiles, and cooking methods, you're now equipped to create croutons that will elevate every salad, soup, or even just a snack. So grab that day-old bread, unleash your inner chef, and prepare to impress yourself and everyone lucky enough to taste your incredible, custom-crafted croutons. Enjoy the crunch!
